If your Android phone is acting up—whether it’s stuck in a boot loop, freezing constantly, or plagued by malware—Android Recovery Mode can be a lifesaver. This specialized bootable partition provides a suite of tools designed to diagnose and fix various issues that your device may encounter. By understanding how to access and utilize Recovery Mode, you can perform essential maintenance tasks like wiping the cache partition, performing a factory reset, or applying system updates, all of which can help restore your phone to optimal performance.
How to Enter Recovery Mode
Accessing Android Recovery Mode is a crucial step in troubleshooting and fixing various issues with your device. The process may vary slightly depending on your phone’s manufacturer, but the general method is similar across most Android devices.
General Method for Most Android Devices
For most Android phones, the general method to enter Recovery Mode is as follows:
1. Power off your device completely.
2. Press and hold the Volume Down and Power buttons simultaneously.
3. Keep holding both buttons until you see the bootloader or recovery menu screen.
4. Use the volume buttons to navigate to “Recovery Mode” and press the Power button to select it.
Specific Instructions for Popular Brands
Samsung Devices:
- Turn off the device.
- Press and hold the Power button and Volume Up button simultaneously.
- Release both buttons when the Samsung logo appears.
Google Pixel Devices:
- Power off the device.
- Press and hold the Power button and Volume Down button together.
- When the bootloader screen appears, use the volume buttons to navigate to “Recovery Mode” and press the Power button to select it.
LG Devices:
1. Turn off the phone.
2. Press and hold the Power button and Volume Down button.
3. When the LG logo appears, quickly release and re-press the Power button while continuing to hold the Volume Down button.
4. Release both buttons when the recovery mode screen appears.
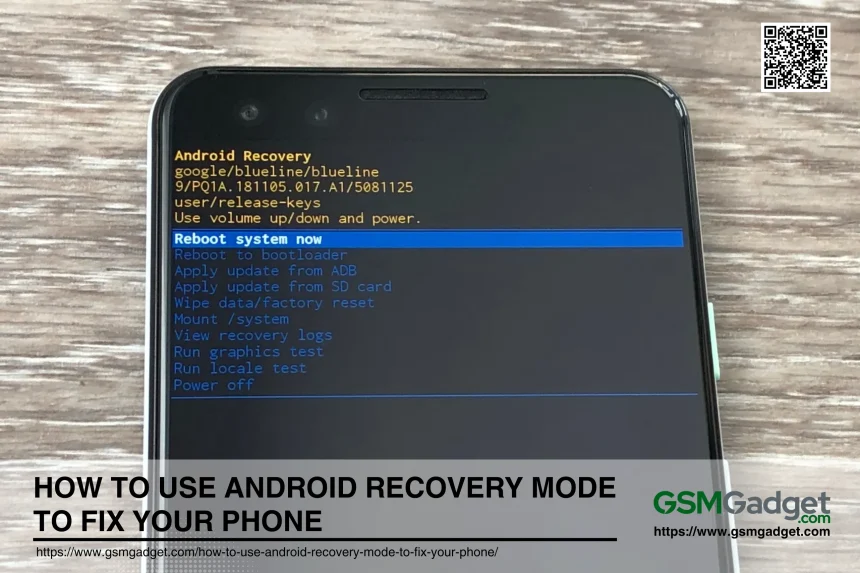
How to Use Android Recovery Mode to Fix Your Phone
Android Recovery Mode is a powerful tool that allows users to perform various system-level tasks on their devices. Here are the key features:
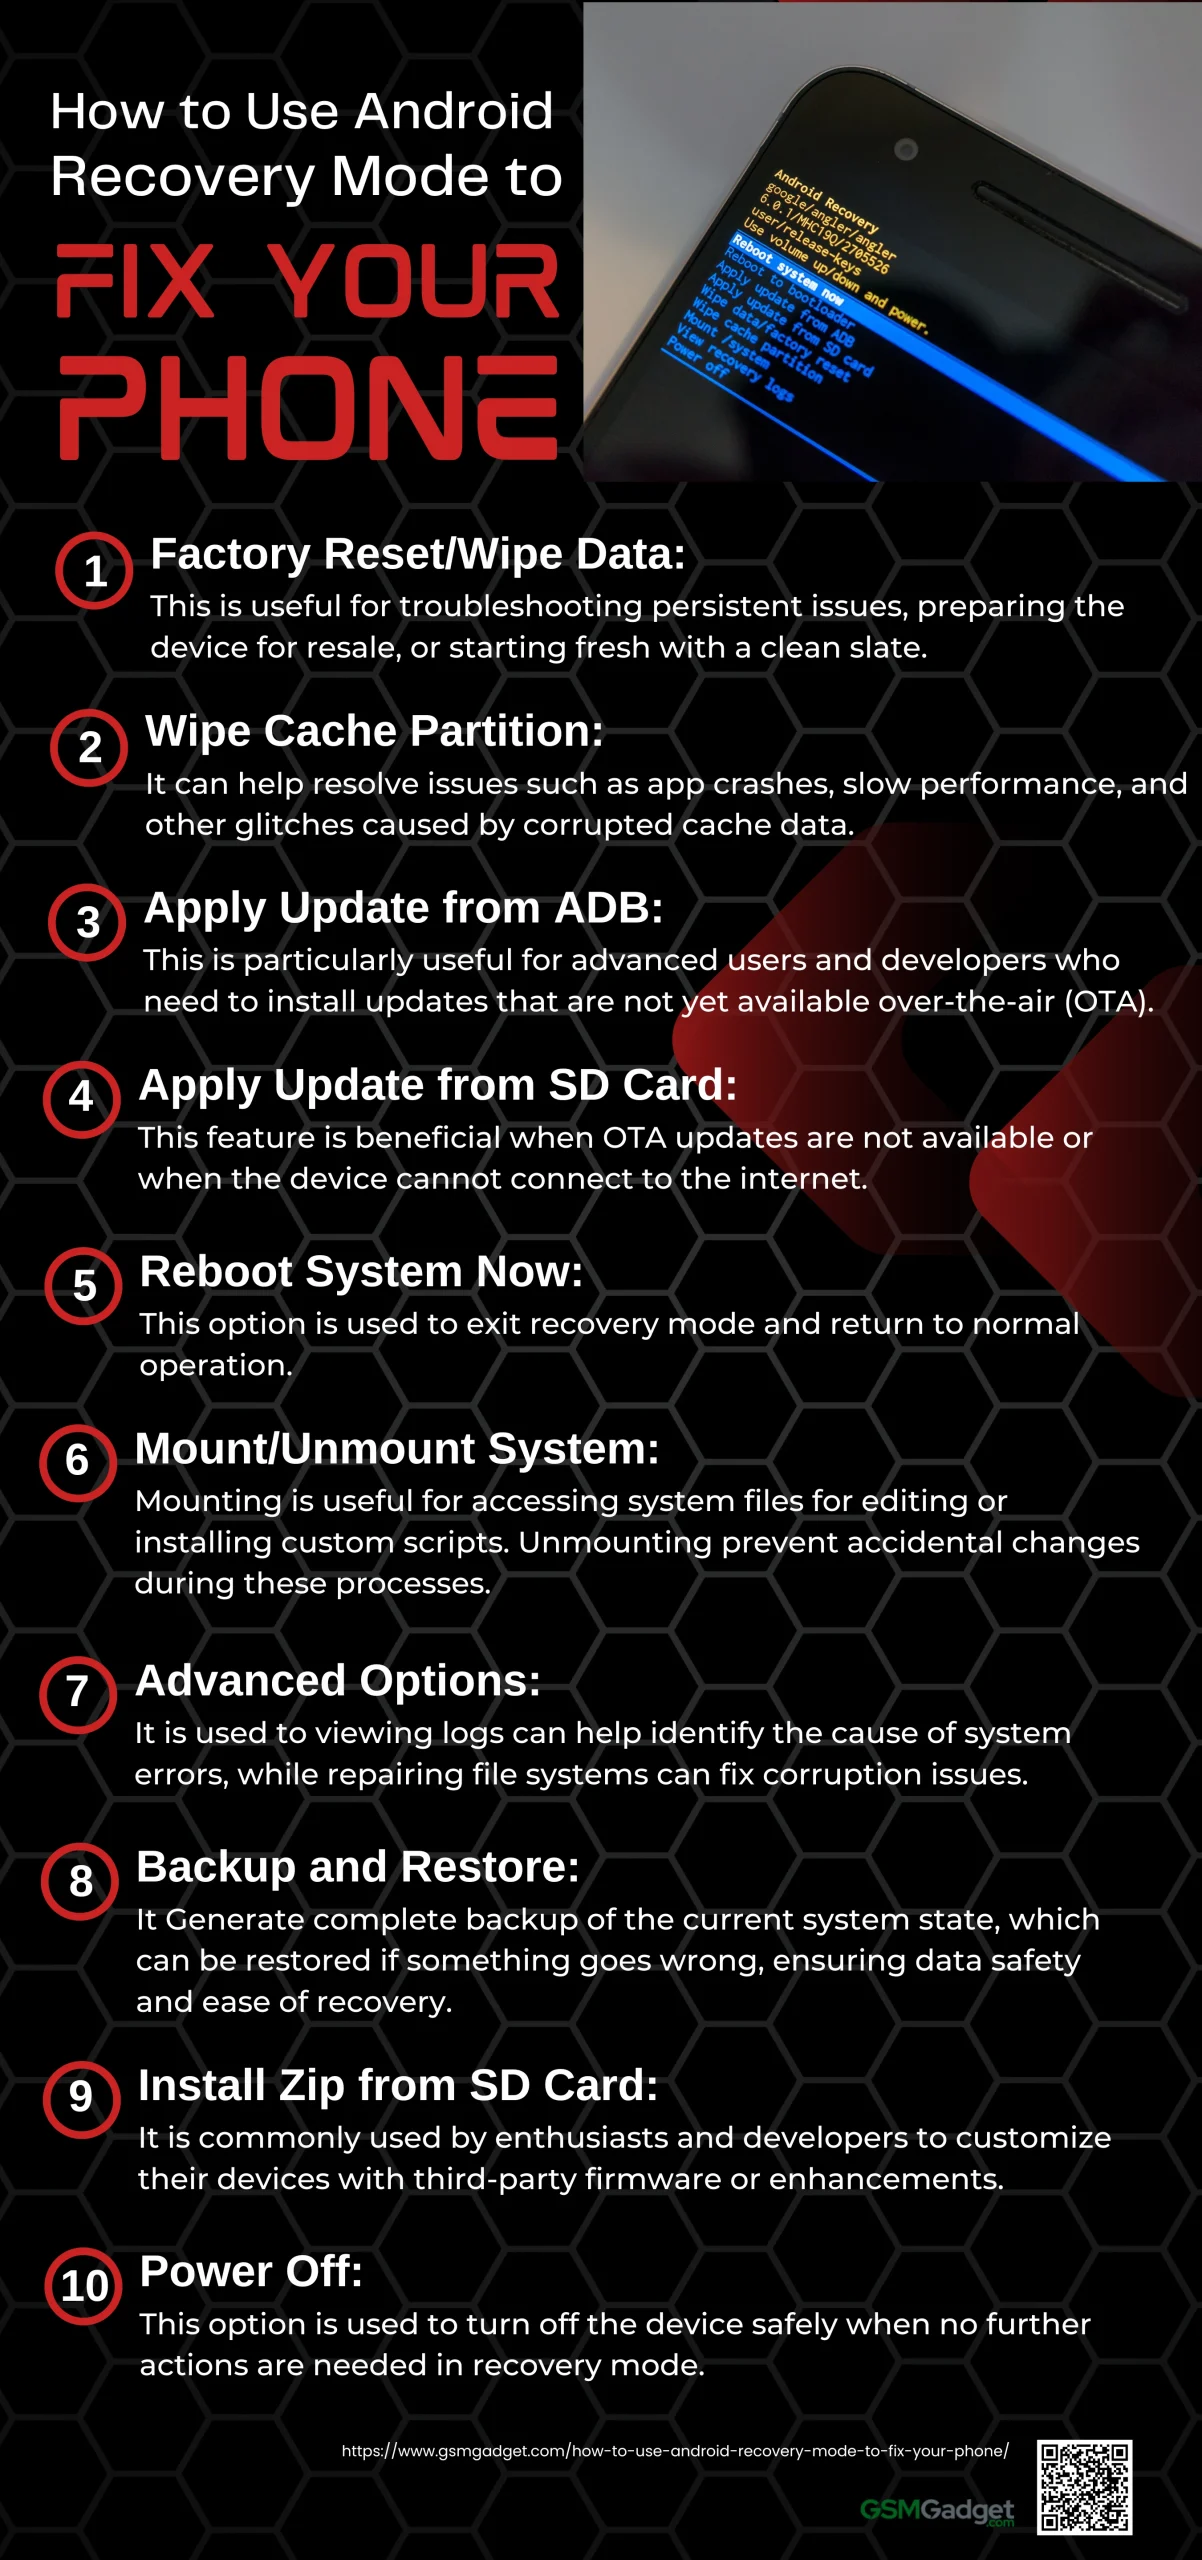
1. Factory Reset/Wipe Data
- What is it?: A factory reset, also known as wiping data, is a feature in Android Recovery Mode that restores the device to its original factory settings. This process erases all user data, including apps, settings, and personal files, effectively making the device as it was when first purchased.
- Use of Factory Reset/Wipe Data: This option is particularly useful for troubleshooting persistent issues, preparing the device for resale, or starting fresh with a clean slate. For instance, if your device is suffering from severe performance issues or malware infections, a factory reset can often resolve these problems by eliminating corrupted files and settings.
2. Wipe Cache Partition
- What is it?: The cache partition stores temporary data used by the system and apps to improve performance. Wiping the cache partition clears this temporary data without affecting personal files or settings.
- Use of Wipe Cache Partition:
Clearing the cache partition can help resolve issues such as app crashes, slow performance, and other glitches caused by corrupted cache data. It is a less drastic measure than a factory reset and is often recommended after system updates to ensure smooth operation.
3. Apply Update from ADB
- What is it?: ADB (Android Debug Bridge) is a command-line tool that allows communication between an Android device and a computer. The “Apply Update from ADB” option enables users to manually install software updates by connecting the device to a computer.
- Use of Apply Update from ADB: This feature is particularly useful for advanced users and developers who need to install updates that are not yet available over-the-air (OTA). It allows for sideloading firmware updates, custom ROMs, or patches directly from a computer, making it a powerful tool for troubleshooting and customization.
4. Apply Update from SD Card
- What is it?:
This option allows users to install software updates stored on an external SD card. The update file, typically in ZIP format, is placed on the SD card and applied through the recovery mode. - Use of Apply Update from SD Card: This feature is beneficial when OTA updates are not available or when the device cannot connect to the internet. It is also useful for installing custom ROMs or other updates provided by third-party developers.
5. Reboot System Now
- What is it?: The “Reboot System Now” option restarts the device and boots it into the main Android operating system.
- Use of Reboot System Now: This option is used to exit recovery mode and return to normal operation. It is typically selected after performing maintenance tasks such as wiping the cache partition or applying updates.
6. Mount/Unmount System
- What is it?: In Android recovery mode, mounting the /system partition makes it accessible for modifications like installing custom ROMs, while unmounting it prevents changes to ensure data integrity during operations like backups. This feature is crucial for advanced troubleshooting and system maintenance tasks.
- Use of Mount/Unmount System
Mounting the system partition is useful for advanced troubleshooting and modifications, such as accessing system files for editing or installing custom scripts. Unmounting the system partition can prevent accidental changes during these processes.
7. Advanced Options
- What is it?: The “Advanced Options” menu in recovery mode may include various additional tools, such as viewing logs, repairing file systems, or running hardware tests.
- Use of Advanced Options: These options are typically used for in-depth troubleshooting and diagnostics. For example, viewing logs can help identify the cause of system errors, while repairing file systems can fix corruption issues.
8. Backup and Restore
- What is it?: Some custom recoveries, like TWRP (Team Win Recovery Project), offer the ability to back up and restore the entire system, including apps, data, and the operating system.
- Use of Backup and Restore: This feature is invaluable for users who frequently experiment with custom ROMs or make significant changes to their device. It allows for a complete backup of the current system state, which can be restored if something goes wrong, ensuring data safety and ease of recovery.
9. Install Zip from SD Card
- What is it?: This option allows users to install custom ROMs, kernels, or other updates in the form of ZIP files stored on an SD card.
- Use of Install Zip from SD Card: This feature is commonly used by enthusiasts and developers to customize their devices with third-party firmware or enhancements. It provides a straightforward method for installing modifications without requiring a computer.
10. Power Off
- What is it?: The “Power Off” option simply powers down the device from recovery mode.
- Use of Power Off: This option is used to turn off the device safely when no further actions are needed in recovery mode. It ensures that the device is powered down without any risk of data corruption.
Back up Data before Using Recovery Mode
Before entering into Android Recovery Mode, it’s important to back up your data to prevent any potential loss. Recovery Mode is a powerful tool that can help resolve various issues, but it also carries the risk of wiping your device clean, erasing all your personal files, apps, and settings. To safeguard your valuable information, use cloud services like Google Drive or physical storage options such as an external hard drive or SD card. By ensuring your data is securely backed up, you can proceed with confidence, knowing that you can restore your device to its previous state if anything goes wrong.
When to Seek Professional Help
If you encounter issues that you cannot resolve through Recovery Mode, or if you are unsure about using advanced features, it’s best to seek professional help. This is especially important if:
- Your phone is stuck in a boot loop and won’t enter Recovery Mode.
- You encounter hardware-related issues.
- You are not comfortable using ADB commands or flashing custom ROMs